
Waterproofing shower remodel projects correctly prevents water damage, mold growth, and costly repairs that can undermine your entire bathroom renovation investment. Proper waterproofing creates a fully waterproof barrier that protects your bathroom floor, walls, and the structure behind them from moisture infiltration. Without adequate protection, even the most beautiful tile shower can fail within months of installation.
Many homeowners focus on visible elements like tile selection and fixtures while overlooking the critical waterproofing layer that determines long-term success. This hidden system works behind the scenes to keep excess moisture where it belongs, and when waterproofing fails, the resulting damage often requires complete demolition and reconstruction of the entire shower enclosure.
The financial impact of inadequate waterproofing extends far beyond the initial installation cost, as water damage can spread through walls, compromise floor joists, and create health hazards from mold development. Professional waterproofing methods protect your investment and ensure your walk in shower performs reliably for decades rather than becoming a source of ongoing problems.
Understanding waterproofing essentials helps you make informed decisions whether you’re hiring professionals or tackling a DIY bathroom remodel. The right materials and installation techniques create a durable barrier that stands up to daily showering while maintaining the structural integrity of your bathroom space.
Why Is Waterproofing Critical in Shower Remodel Projects?

Protecting Your Home’s Structure
Waterproofing serves as the primary defense against moisture problems that can compromise your home’s structural integrity over time. Water that penetrates shower walls travels through the building envelope and saturates framing members, subflooring, and insulation materials that were never designed to stay wet. This continuous moisture exposure leads to wood rot, rust in metal components, and deterioration of structural elements that support your bathroom.
The damage from failed waterproofing often remains hidden until significant problems develop throughout surrounding rooms. Water follows the path of least resistance through wall cavities and floor systems, potentially affecting areas far from the original leak source. By the time you notice stains, soft spots, or mildew growth in adjacent spaces, extensive damage may have already occurred behind finished surfaces.
Financial Implications of Waterproofing Failures
The cost to repair water damage typically exceeds the expense of proper waterproofing by a factor of ten or more. Remediation requires removing finished materials, addressing structural damage, eliminating mold, and rebuilding the affected areas with correct waterproofing systems. This process disrupts your home for weeks while generating expenses that dwarf the original installation budget.
According to the National Association of Home Builders, water intrusion and moisture-related issues rank among the most common and expensive home repair problems. Proper waterproofing prevents these costly scenarios by creating reliable barriers that keep water contained where it belongs throughout the life of your shower installation.
What Are the Main Shower Waterproofing Options Available?
Liquid Membranes for Flexible Protection
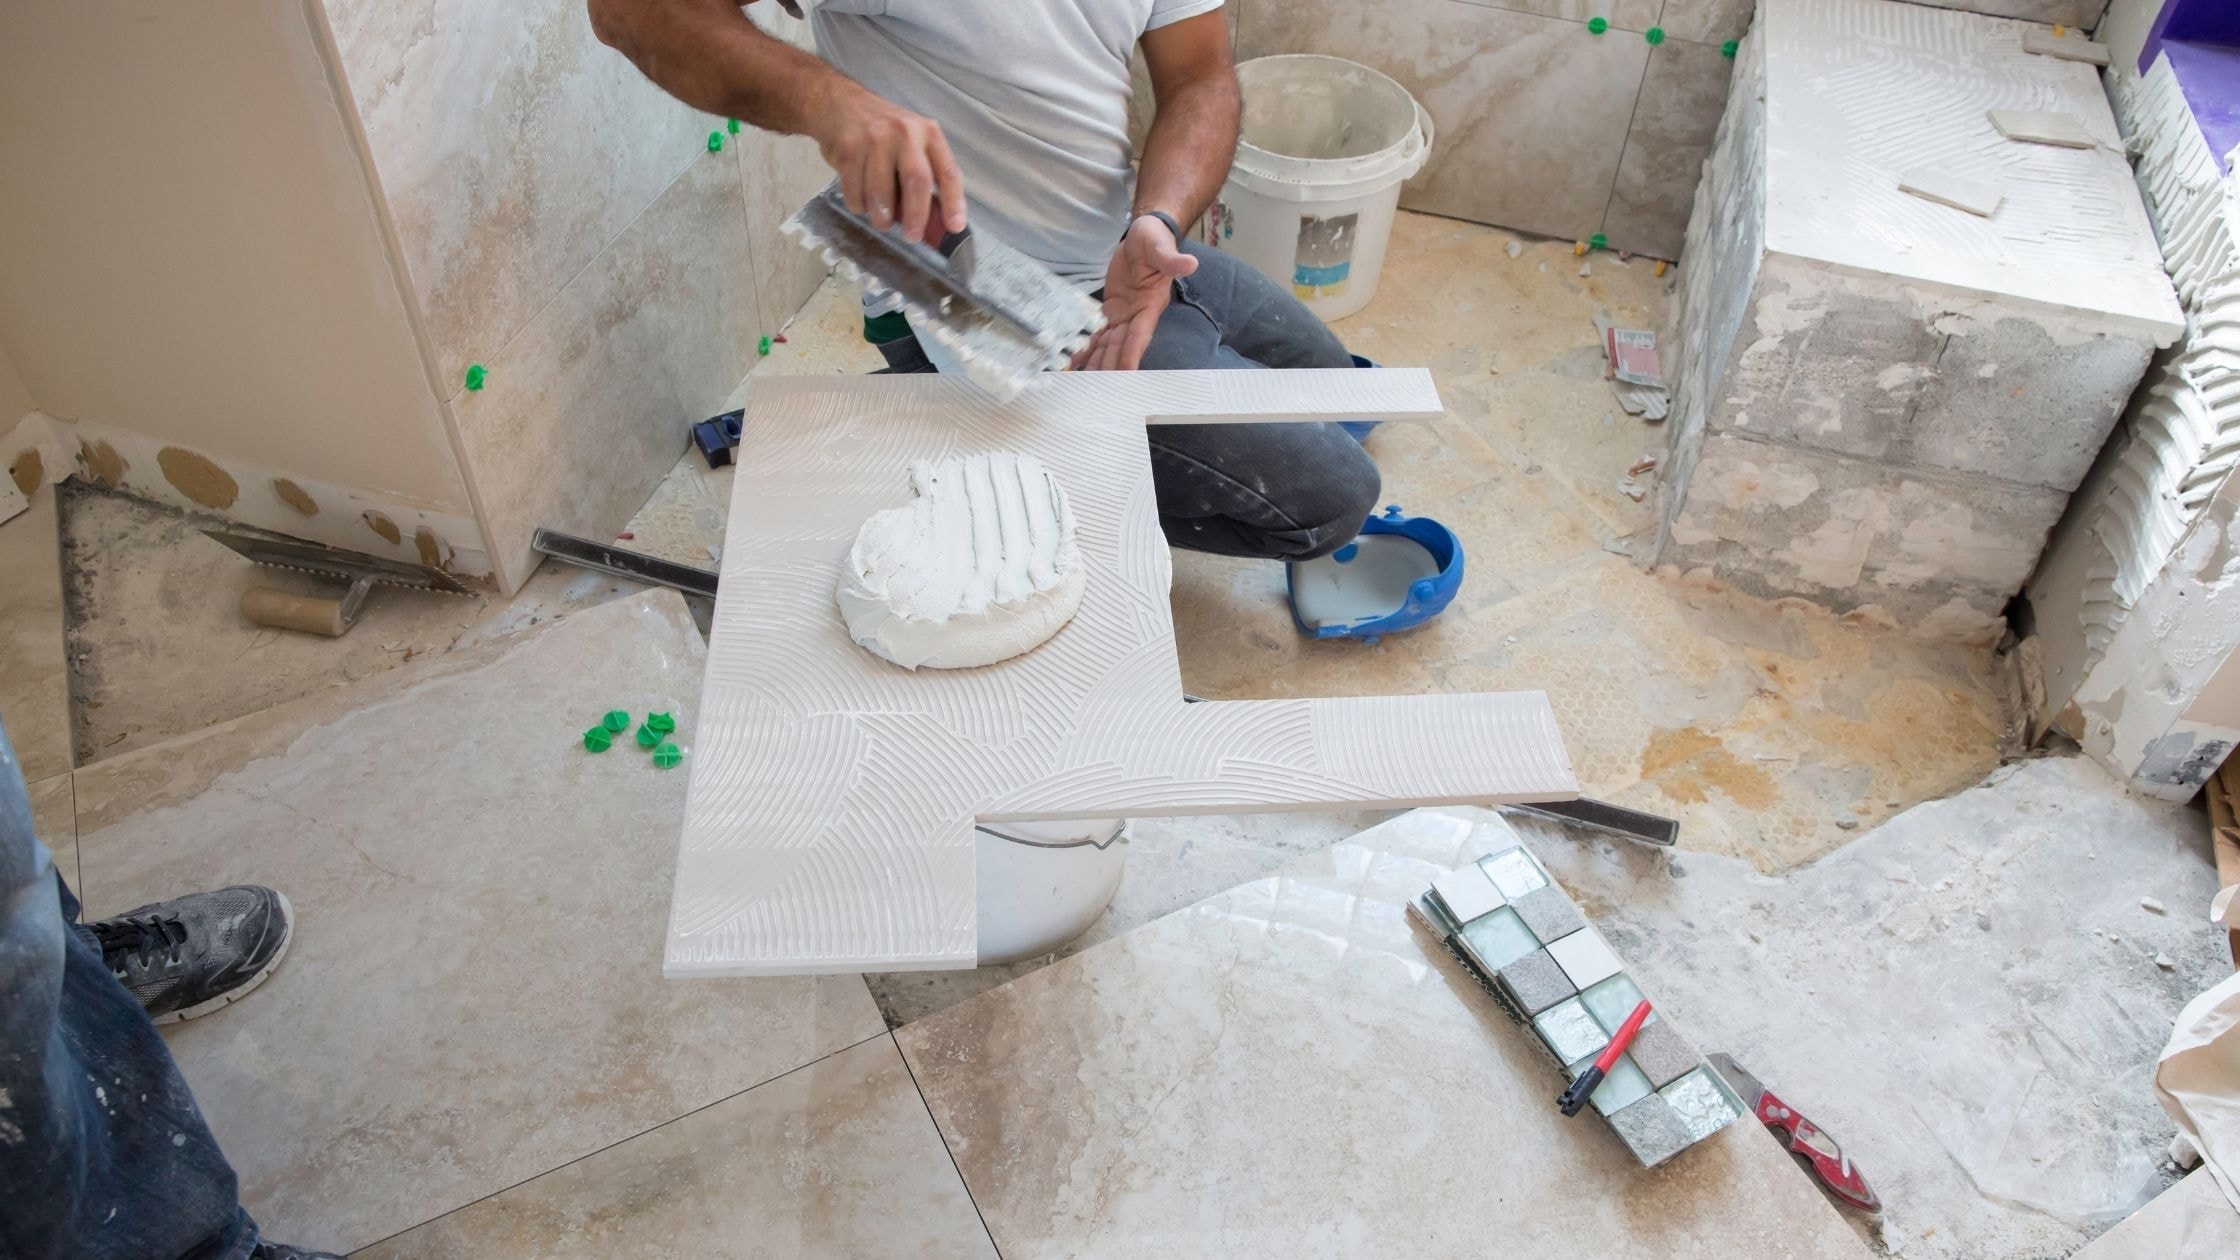
Liquid membranes provide waterproof coverage that adapts to various substrate materials and surface irregularities. These products apply with a paint roller or brush, creating a continuous barrier that bonds directly to cement board, concrete, or other approved surfaces. The flexibility of liquid membranes allows them to accommodate minor substrate movement without cracking or losing adhesion.
Most liquid membrane systems require two coats for complete protection, with adequate drying time between applications. The first coat establishes the base waterproof layer, while the second coat ensures complete coverage and proper thickness throughout the wet area. Professional installers often add fabric reinforcement at seams and corners for enhanced durability in these vulnerable locations.
Sheet Membrane Systems
Sheet membrane products come in rolls that installers cut to size and apply to shower walls and floor surfaces. These membranes create a physical barrier between the tile installation and the substrate materials below. Seam tape bonds overlapping sections together to maintain continuity across the entire waterproofed surface.
The advantage of sheet membranes lies in their consistent thickness and visual confirmation of complete coverage during installation. However, the method can be more time consuming than liquid applications, particularly around complex shapes, corners, and penetrations for shower valves and accessories.
Kerdi Board System Integration
Kerdi board represents an integrated approach that combines substrate, waterproofing, and tile backing in a single lightweight panel. This cement-free alternative to traditional cement board simplifies installation while providing reliable moisture protection. The boards feature a waterproof surface coating that eliminates the need for separate membrane applications on the panel faces.
Kerdi band reinforces seams between panels, creating watertight connections throughout the installation. This system approach reduces the steps required to achieve a fully waterproof shower enclosure while maintaining professional-grade protection against water intrusion.
Big Blue’s Tip: Always extend your waterproof membrane at least 6 inches beyond the shower curb or threshold to prevent water from wicking into adjacent floor areas during use.
How Do You Properly Waterproof a Shower Pan?
Foundation and Slope Requirements
The shower pan forms the foundation of your entire waterproofing system and requires careful attention to drainage slope and structural support. Proper slope directs water toward the drain without creating puddles or standing water that can stress waterproof membranes over time. Building codes typically require a minimum slope of 1/4 inch per foot to ensure adequate drainage.
A prefabricated shower pan provides a pre-sloped surface with integrated waterproofing that simplifies installation for many projects. These units arrive ready to install with proper drainage characteristics built in, reducing the complexity of achieving correct slope and waterproof integrity. Custom mud-set pans offer more flexibility for unique sizes but require expertise to build and waterproof correctly.
Layered Waterproofing Approach
The floor waterproofing system includes multiple components that work together to contain water effectively:
- A waterproof membrane that extends up the walls to prevent seepage at wall-to-floor transitions
- Proper integration with the drain assembly to seal this critical penetration point
- Reinforcement at corners and transitions where stress can compromise membrane integrity
- Adequate overlap with wall waterproofing to create continuous protection throughout the enclosure
The connection between floor and wall waterproofing requires particular attention because this transition experiences constant water exposure during showering. Gaps or weak points in this junction allow water to penetrate behind the installation, leading to the moisture problems that waterproofing aims to prevent.
Testing Before Tile Installation
Conducting a flood test before installing tile verifies that your waterproof membrane functions correctly and identifies any leaks while correction remains simple. Dam the shower threshold and fill the pan with several inches of water, then monitor for 24-48 hours to ensure water levels remain stable. Any drop in water level indicates a leak that requires immediate attention before proceeding with tile work.
Did you know? Most waterproofing failures occur at transitions, corners, and penetrations rather than on flat surfaces, which is why these areas require extra reinforcement and careful detailing during installation.
What Materials Do You Need for Shower Waterproofing?
Substrate and Backing Materials
Cement board provides a stable, moisture-resistant substrate for tile installation in wet areas like shower enclosures. These panels withstand direct water exposure without deteriorating like standard drywall, making them appropriate for areas that will be tiled and waterproofed. Cement boards come in various thicknesses, with 1/2-inch being most common for walls and thicker options for floors.
The panels must be installed with proper fastening and appropriate spacing at seams to accommodate building movement without cracking. While cement board resists moisture damage, it is not waterproof on its own and requires a separate waterproof membrane to create a complete moisture barrier system.
Waterproof Membrane Products
Selecting the right waterproof membrane depends on your project requirements, budget, and installation expertise:
- Liquid membranes offer ease of application for DIY projects and provide excellent coverage around complex shapes
- Sheet membranes deliver consistent thickness and visual installation verification
- Integrated systems like Kerdi board combine multiple functions for streamlined installation
- Each option provides reliable protection when installed according to manufacturer specifications
All membrane types require proper surface preparation, including clean, dust-free substrates and appropriate priming when specified. The membrane bonds to the substrate and creates the critical water barrier that protects underlying structures.
Sealing and Reinforcement Components
Seam tape reinforces joints between substrate panels and membrane sections where separation could allow water penetration. This tape bonds to both surfaces and creates a sealed transition that maintains waterproof integrity across the entire installation. Corners, floor-to-wall transitions, and around penetrations all benefit from additional reinforcement.
Waterproof sealant fills gaps around shower valves, drain assemblies, and other penetrations that interrupt the continuous membrane surface. These sealants must be compatible with your chosen membrane system and maintain flexibility to accommodate minor movement without cracking or losing adhesion over time.
How Do You Waterproof Shower Walls Correctly?

Surface Preparation Requirements
Proper waterproofing begins with clean, sound substrate surfaces free from dust, oils, and loose materials that could compromise membrane adhesion. The cement boards or other backing materials must be securely fastened to wall framing with appropriate screws or fasteners spaced according to manufacturer specifications. Any gaps, damaged areas, or irregularities should be addressed before applying waterproof membranes.
Check that all substrate panels are flush with each other and properly aligned to create even surfaces for tile installation. Uneven substrates can create voids behind membranes that may fill with water and compromise the waterproofing system’s effectiveness over time.
Strategic Membrane Application
Installing waterproof membranes on shower walls requires systematic coverage that ensures protection across the entire wet area:
- Start at the bottom near the shower pan and work upward to allow proper overlap at seams
- Apply membrane material according to manufacturer instructions for thickness and coverage
- Pay special attention to inside corners where walls meet, using reinforcement fabric or additional material
- Extend membrane coverage at least 6 inches beyond areas that will receive direct water spray
- Ensure proper integration with floor waterproofing for continuous moisture barrier
The overlap between membrane sections must meet minimum requirements specified by the manufacturer to prevent water from finding gaps in coverage. Seam tape or additional membrane material bridges these transitions and creates sealed connections throughout the system.
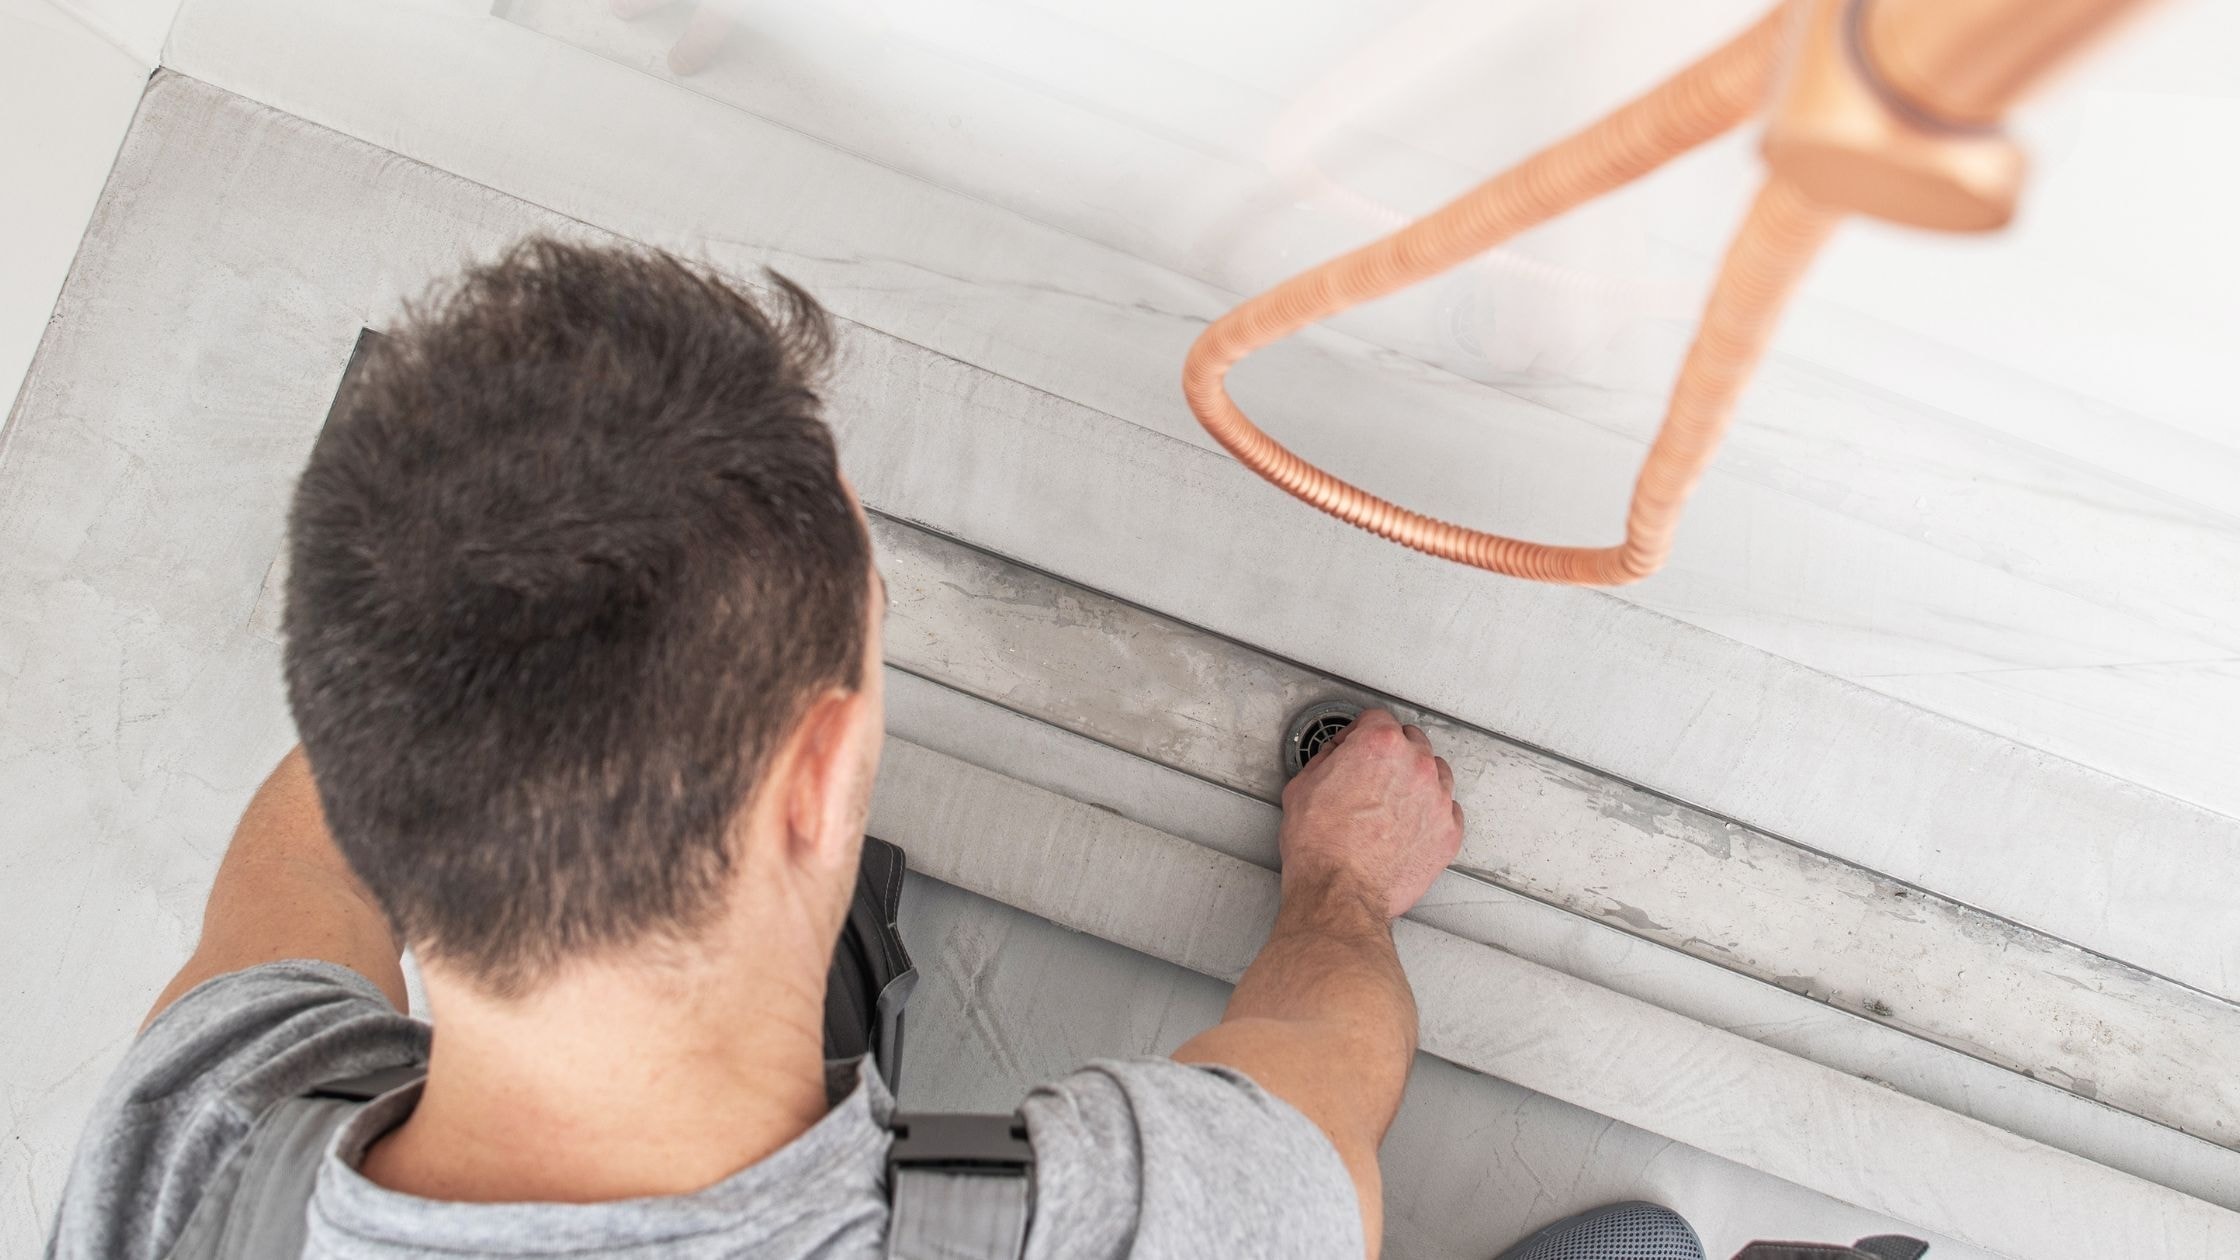
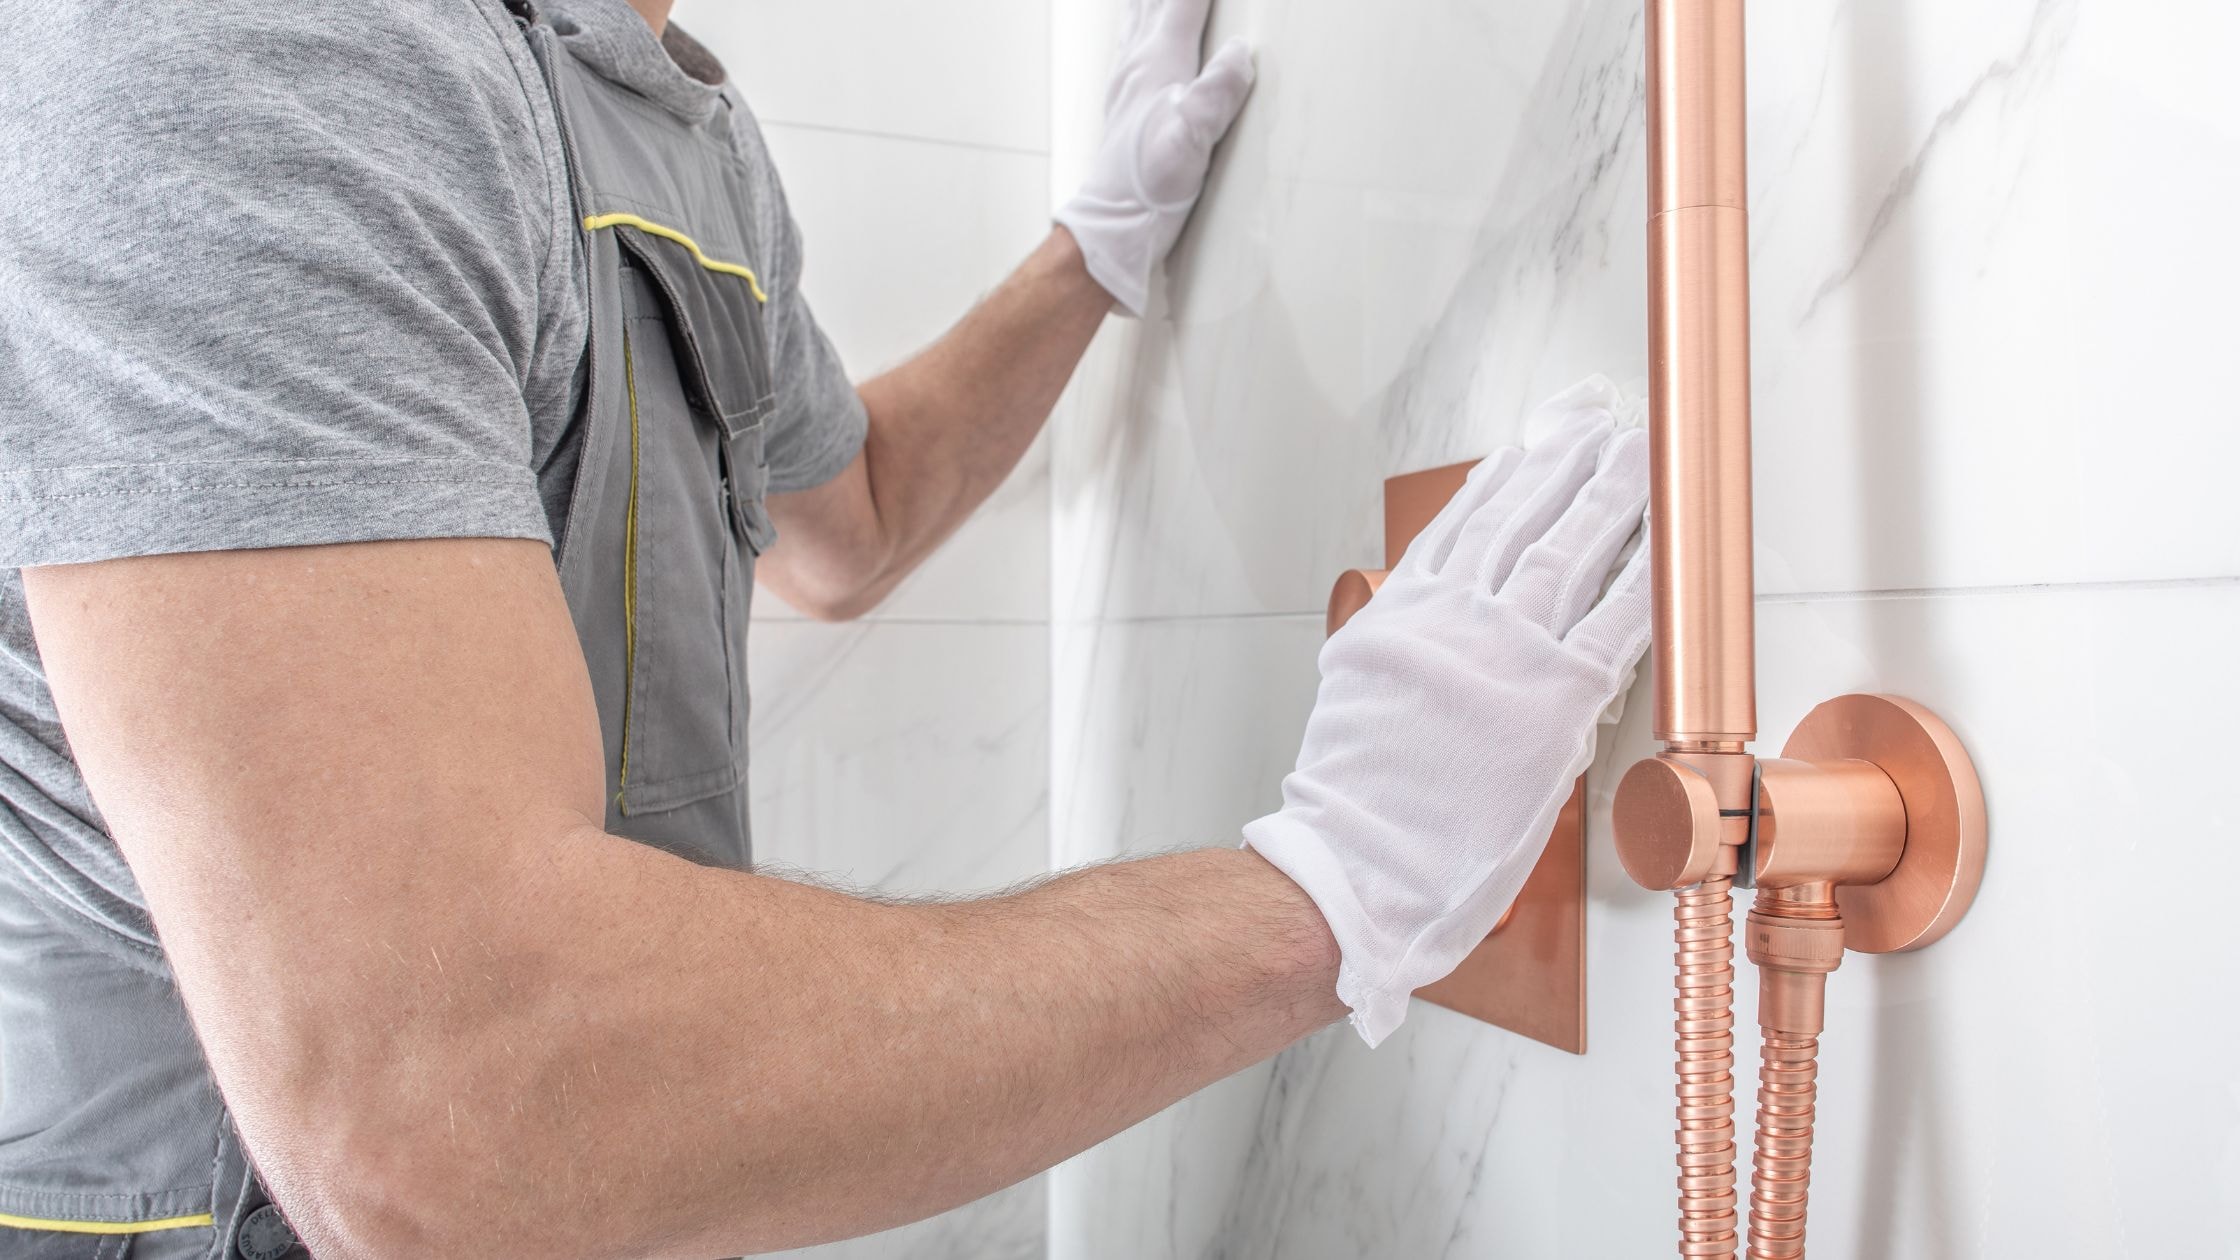
Dealing with Penetrations and Fixtures
Shower valve installations, accessories, and any wall penetrations require special waterproofing attention because these openings interrupt the continuous membrane barrier. The waterproof membrane must seal tightly around these penetrations using appropriate boots, gaskets, or sealant materials designed for this purpose.
Test all sealed penetrations for water tightness before installing tile by spraying water directly at these locations and checking for any moisture on the back side. This verification step identifies problems while correction remains relatively simple and inexpensive.
Big Blue’s Tip: Use a foam brush or small paint roller to work membrane material into tight corners and around penetrations where full-size rollers can’t reach, ensuring complete coverage in these vulnerable areas.
What Common Waterproofing Mistakes Should You Avoid?

Inadequate Coverage and Preparation
Rushing through surface preparation leads to adhesion failures that compromise the entire waterproofing system. Membranes require clean substrates to bond properly, and any contamination from dust, construction debris, or oils can prevent proper adhesion. Taking time to prepare surfaces correctly pays dividends in long-term performance and reliability.
Insufficient membrane coverage represents another frequent error, particularly at transitions between surfaces and around fixture penetrations. The waterproof membrane must extend into all areas that will experience moisture exposure, not just surfaces directly under the showerhead. Water splashes, bounces, and travels along walls in ways that require comprehensive protection throughout the entire shower enclosure.
Improper Seam and Corner Treatment
Seams between membrane sections and inside corners where walls meet create potential weak points in your waterproofing system. These areas experience stress from building movement and concentrated water exposure that can lead to separation or cracking if not properly reinforced. Fabric reinforcement, additional membrane material, or specialized corner products strengthen these vulnerable locations.
The junction between walls and floor requires particular attention because this horizontal-to-vertical transition experiences constant water flow during every shower. The waterproof membrane must form a continuous barrier across this change in plane without gaps or weak spots that allow water penetration.
Insufficient Drying Time
Applying tile or proceeding with subsequent installation steps before membranes cure completely compromises their effectiveness and adhesion. Liquid membranes require adequate drying time between coats and before tile installation, with specific timing varying based on temperature, humidity, and ventilation conditions. Patience during this phase ensures the membrane achieves full strength and waterproof performance.
Manufacturers provide specific guidance on drying times and environmental conditions required for proper curing. Following these specifications prevents problems that emerge when membranes are disturbed or loaded before reaching full cure, which can create invisible defects that allow water intrusion.
For comprehensive guidance on avoiding other common issues during your conversion project, see Common Mistakes to Avoid in a Tub-to-Shower Conversion.
Which Waterproofing Method Works Best for Walk-In Showers?

Curbless Shower Considerations
Walk in shower designs without traditional curbs or thresholds require especially careful waterproofing attention because water can flow freely toward adjacent floor areas. The waterproof membrane must extend well beyond the shower area into the surrounding bathroom floor to prevent water from penetrating these transition zones. Many installations benefit from waterproofing the entire bathroom floor to eliminate concerns about water migration.
The floor slope becomes critical in curbless installations because proper drainage prevents water from traveling away from the shower area. A continuous slope toward the drain throughout the shower space and a subtle transition to the main bathroom floor controls water movement and directs it where intended.
Kerdi Board Advantages for Modern Showers
Kerdi board systems work particularly well for walk in shower installations because the lightweight panels simplify construction while providing integrated waterproofing. The boards cut easily to create custom shower configurations without the weight and complexity of traditional cement board and separate membrane applications. This streamlined approach reduces installation time while maintaining professional-grade moisture protection.
The system includes coordinated components like Kerdi band for seams, pre-formed corners, and specialized products for shower pans and benches. Using components designed to work together ensures compatibility and reliable performance throughout the installation.
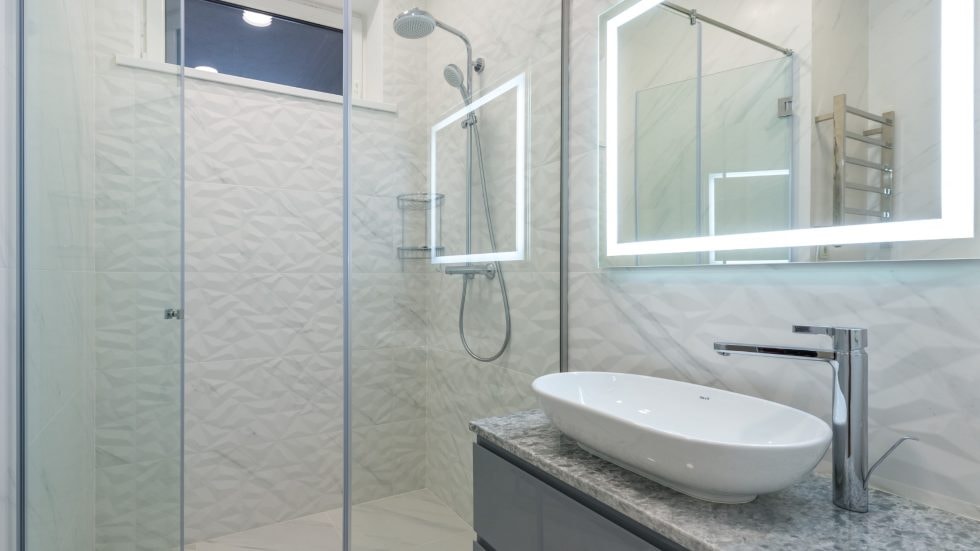
Tile Shower Integration
The waterproof membrane serves as the foundation for your tile shower finish, with the tile and grout providing the decorative surface rather than waterproof protection. Porcelain tiles offer excellent durability and moisture resistance for shower applications, creating attractive, easy-to-clean surfaces that last for decades. The grout between tiles allows some water penetration, which is why the membrane below must provide the actual waterproof barrier.
Proper tile installation includes appropriate thinset mortar selection, correct tile spacing, and adequate grout joint width to accommodate building movement. These details work together with waterproofing to create a complete, durable shower system that performs reliably over its entire service life.
For more information about planning your conversion project, visit The Complete Guide to Tub-to-Shower Conversions.
How Can You Tell If Your Shower Waterproofing Failed?
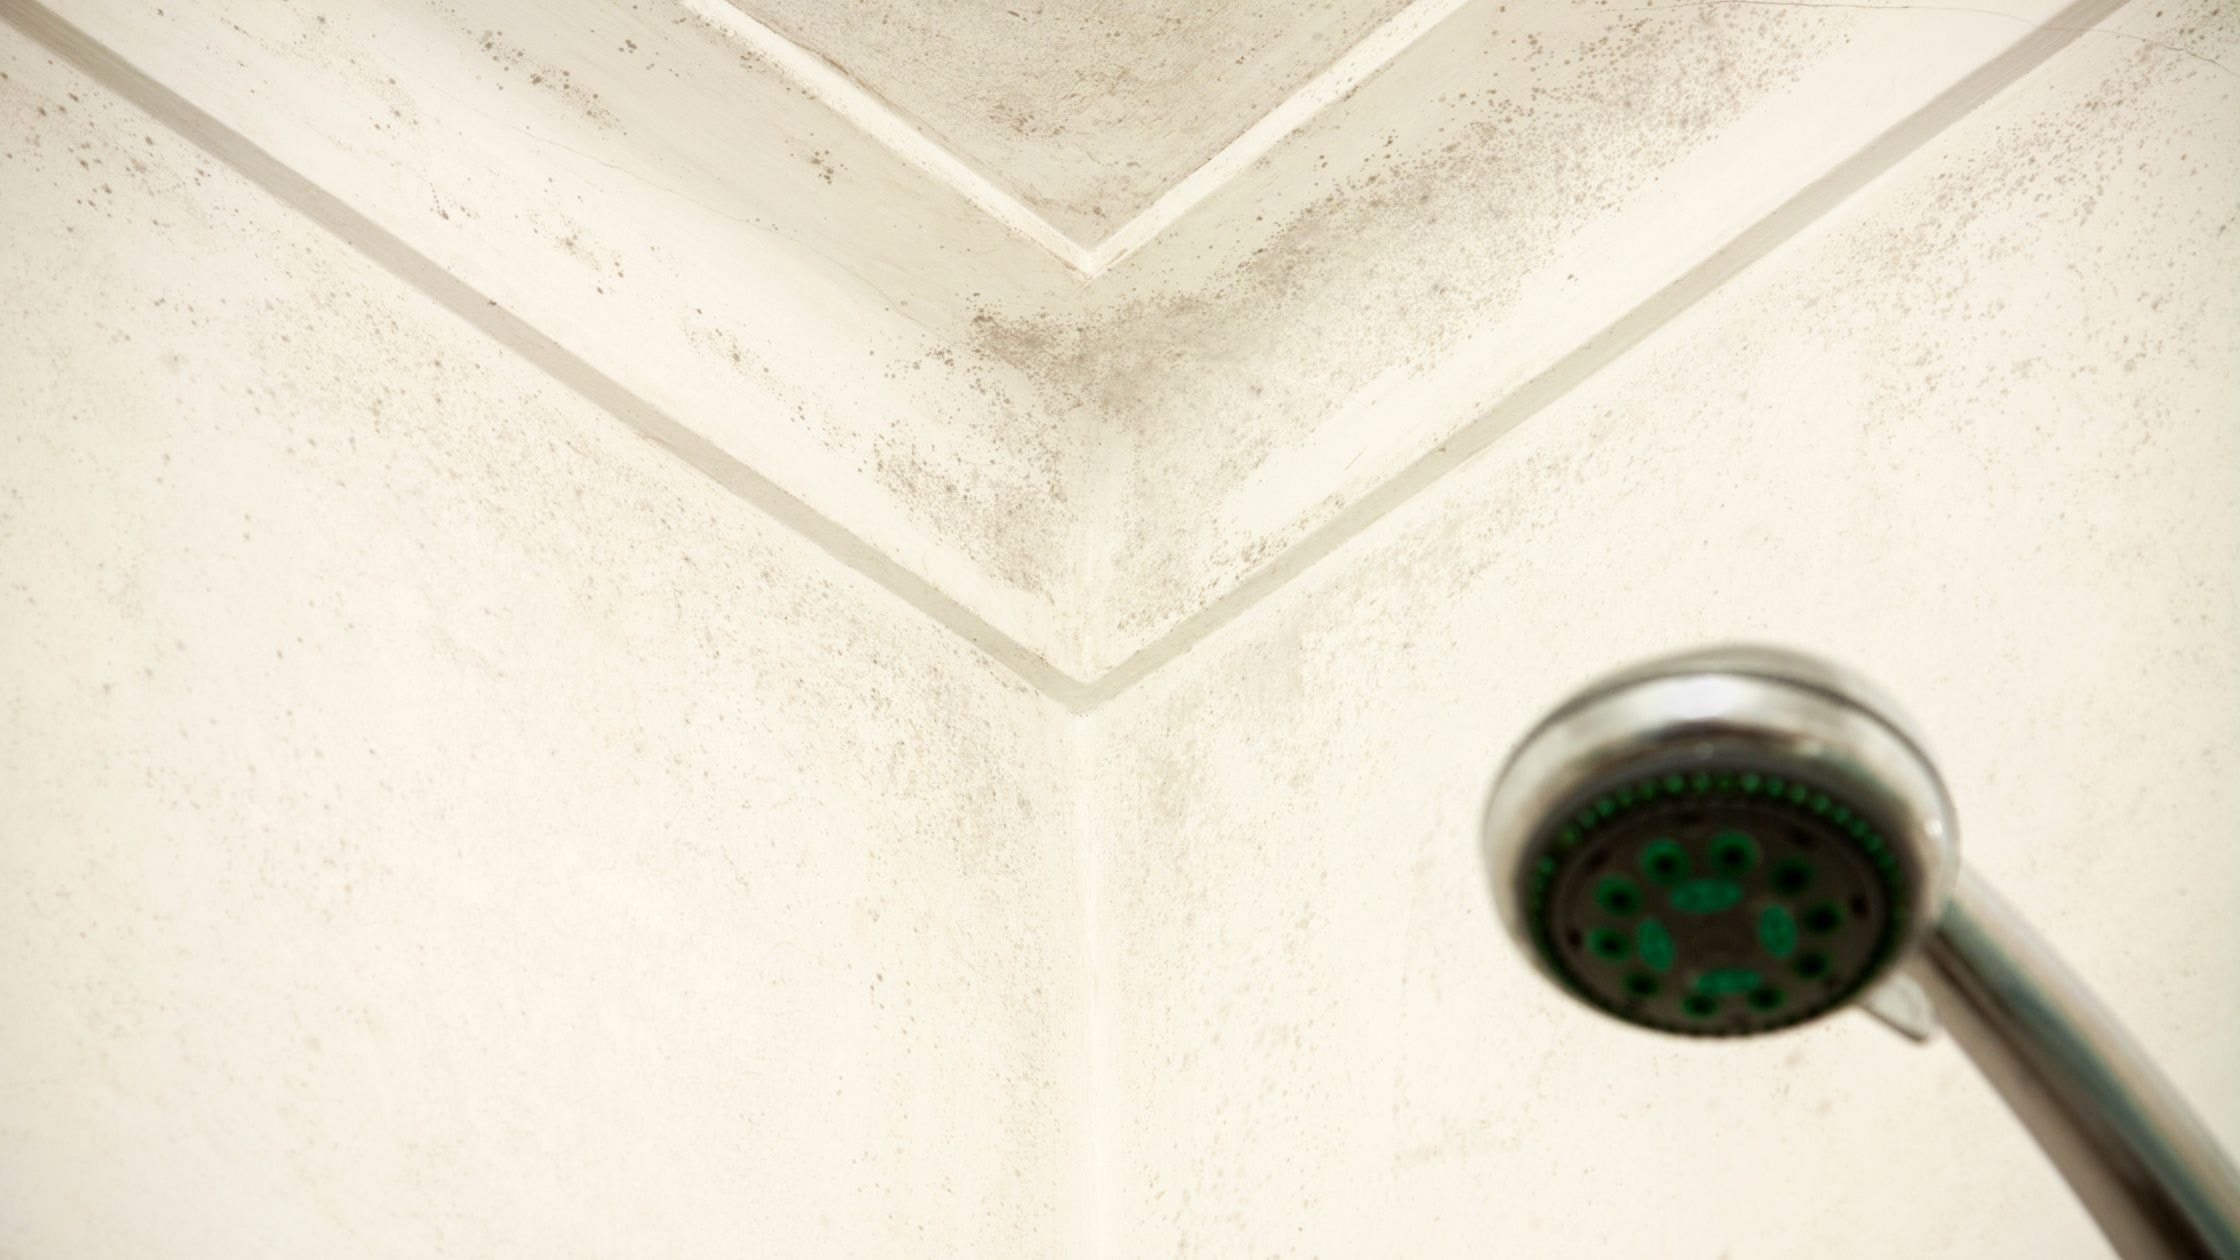
Visible Warning Signs
Water stains on ceilings or walls adjacent to your shower indicate that moisture has penetrated through the waterproofing system and traveled into surrounding spaces. These stains often appear as discolored patches, peeling paint, or bubbling textures that signal ongoing water intrusion behind finished surfaces.
Loose or hollow-sounding tiles suggest that water has compromised the mortar bond between the tile and substrate, typically because the waterproof membrane failed and allowed moisture to accumulate behind the installation. Tiles that move when pressed or sound different when tapped may indicate this type of water damage.
Hidden Damage Indicators
Musty odors in or near your bathroom point to mold and mildew growth within wall cavities or under flooring where moisture has accumulated. These biological growths thrive in damp environments created by waterproofing failures and can affect indoor air quality while indicating serious moisture problems.
Grout that remains perpetually damp or develops dark staining may signal that water is being absorbed into the substrate because the waterproof membrane has failed. While some dampness immediately after showering is normal, grout should dry completely within a few hours under typical conditions.
Addressing Discovered Moisture Problems
Once waterproofing failure becomes apparent, the only reliable solution involves removing the tile installation and rebuilding with proper waterproofing systems. Attempting to seal over failed waterproofing from the inside rarely succeeds because water has already found paths through the system that surface treatments cannot effectively block.
Professional assessment helps determine the extent of damage and the scope of repairs required to restore proper function. Water damage often extends beyond the obviously affected areas, requiring investigation to identify all compromised materials before reconstruction begins.
To enhance your shower’s safety features during any necessary repairs, review Safety Features to Add During a Tub-to-Shower Conversion.
What Are the Best Practices for Long-Term Waterproofing Performance?
Regular Inspection and Maintenance
Examining your shower regularly for early signs of problems allows you to address minor issues before they escalate into major failures. Check grout lines for cracks or gaps that could allow water to reach the substrate, and inspect caulk joints around fixtures and at wall-to-floor transitions for separation or deterioration. These simple inspections take only minutes but can identify problems while repairs remain straightforward.
Maintaining good ventilation in your bathroom reduces the overall moisture load on waterproofing systems and helps prevent mold growth on surfaces. Running exhaust fans during and after showering removes excess moisture from the air before it can condense on surfaces or penetrate into building materials.
Proper Cleaning Methods
Using appropriate cleaning products preserves grout and sealant materials that provide secondary moisture protection in your tile shower. Harsh chemicals can deteriorate grout over time and damage caulk joints, creating openings for water penetration. Mild, pH-neutral cleaners designed for tile maintain surfaces without causing damage to waterproofing components.
Avoid abrasive scrubbing tools that can scratch tile surfaces or remove material from grout joints. These physical damages create rough surfaces where soap scum and mildew accumulate more readily while potentially compromising the protective layers that help shed water.
Proactive Repairs
Addressing small problems promptly prevents them from developing into expensive repairs requiring full shower reconstruction. Regrouting isolated cracked joints or replacing deteriorated caulk takes minimal time and expense while maintaining waterproofing integrity. Delaying these simple repairs allows water intrusion that can cause extensive hidden damage over time.
Professional inspection every few years provides expert assessment of your shower’s condition and identifies developing issues that homeowners might miss. This preventive approach protects your investment in proper waterproofing by catching problems early when solutions remain simple and affordable.
Frequently Asked Questions About Shower Waterproofing
Can you waterproof over existing tile in a shower?
Waterproofing over existing tile rarely succeeds because proper waterproofing requires direct contact with solid substrate materials like cement board or concrete. The tile surface cannot provide adequate adhesion for waterproof membranes, and any existing waterproofing problems will continue behind the new surface treatment. Effective waterproofing requires removing old tile and installing new waterproof membranes on prepared substrates.
How long does shower waterproofing take to install?
Installing waterproof membranes typically requires one to three days depending on the chosen system, shower size, and drying time requirements. Liquid membranes need adequate curing time between coats and before tile installation, while sheet membranes and Kerdi board systems can proceed to tile work more quickly. Weather conditions, humidity levels, and ventilation affect drying times and overall project duration.
What is the difference between water-resistant and waterproof materials?
Water-resistant materials can withstand brief or limited moisture exposure without damage but are not designed for continuous wet conditions. Waterproof materials create a complete barrier that prevents water penetration regardless of exposure duration or conditions. Shower installations require truly waterproof membranes rather than merely water-resistant products to protect against the constant moisture these spaces experience.
Do all showers need waterproofing behind the tile?
Yes, all tile showers require waterproof membranes behind the tile installation to protect wall and floor structures from moisture damage. Tile and grout are not waterproof on their own despite appearing solid, and water readily penetrates these materials to reach substrates below. The waterproof membrane provides the actual moisture barrier while tile serves as the decorative, cleanable finish surface.
How do you know if waterproofing membrane is applied correctly?
Correctly applied waterproof shower membranes show consistent coverage without thin spots, gaps, or missed areas. Liquid membranes should have uniform color and texture across the entire surface with proper reinforcement at corners and seams. Sheet membranes should lie flat without bubbles or wrinkles, with all seams properly taped and sealed. Professional installation ensures correct application techniques and appropriate quality control.
Can you DIY shower waterproofing or should you hire a professional?
DIY shower waterproofing is possible for homeowners with good attention to detail and willingness to follow manufacturer instructions carefully. However, the consequences of improper waterproofing are severe enough that many homeowners prefer professional installation for peace of mind. Professional installers bring experience with various substrate conditions, proper integration of components, and knowledge of building codes that helps ensure reliable long-term performance.
Protecting Your Investment Through Proper Waterproofing
Waterproofing represents the most critical element of any shower installation, determining whether your beautiful new tile shower provides years of reliable service or becomes a source of expensive problems. The investment in proper waterproofing materials and installation techniques protects your entire renovation project while preventing the water damage that can affect your home’s structure and your family’s health.
Blue Mountain Bathrooms brings expertise in quality craftsmanship and customer satisfaction to every bathroom remodel project. Their professional approach to waterproofing ensures that your shower conversion is built to last, with attention to the details that make the difference between adequate and exceptional results. Understanding waterproofing essentials helps you make informed decisions that protect your home and your investment for decades to come.